 2d8830960b
Remove emojis and em dash separators
Simplify introductory sentences
Standardize section headings
6.7 KiB
title, date, weight, sidebar, cascade
| title | date | weight | sidebar | cascade | ||||
|---|---|---|---|---|---|---|---|---|
| My First Lab | 2025-02-14T12:00:00+02:00 | 2 |
|
|
Introduction
In this article, we're going to set up our very first Containerlab netlab using DevPod. We'll use a cloud provider, in this case AWS, to host our project. Why the cloud? Because network labs can consume a huge amount of resources, and we need to deploy, stop, and destroy them quickly, both for performance and cost.
We'll achieve this by combining:
- DevPod
- DevContainer
- Containerlab
We'll use a simple topology that you can find on my GitHub repository. Our goal is to deploy this lab on AWS with DevPod.
Prerequisites
Before starting, a few things need to be in place:
-
AWS environment authorization: make sure DevPod is authorized to access your AWS environment. For a detailed guide on configuring DevPod with AWS, check out my article on this topic.
-
Containerlab topology: we need a topology file that Containerlab can understand. In our case, we'll create a simple VXLAN topology.
Containerlab topology
Our lab will simulate a VXLAN topology consisting of:
- 1 Spine switch
- 2 Leaf switches
- 2 Host nodes
The following diagram illustrates the VXLAN topology:

Here's the Containerlab topology file (lab_vxlan.yml) used for this configuration:
name: vxlan-evpn-irb
topology:
  nodes:
    spine1:
      kind: ceos
      image: ceos:4.32.0.1F
      mgmt-ipv4: 172.20.20.101
    leaf1:
      kind: ceos
      image: ceos:4.32.0.1F
      mgmt-ipv4: 172.20.20.11
    leaf2:
      kind: ceos
      image: ceos:4.32.0.1F
      mgmt-ipv4: 172.20.20.12
    host1:
      kind: linux
      image: alpine:latest
      binds:
        - hosts/h1_interfaces:/etc/network/interfaces
      mgmt-ipv4: 172.20.20.21
    host2:
      kind: linux
      image: alpine:latest
      binds:
        - hosts/h2_interfaces:/etc/network/interfaces
      mgmt-ipv4: 172.20.20.22
  links:
    - endpoints: ["spine1:eth1", "leaf1:eth1"]
    - endpoints: ["spine1:eth2", "leaf2:eth1"]
    - endpoints: ["leaf1:eth2", "host1:eth1"]
    - endpoints: ["leaf2:eth2", "host2:eth1"]
Breaking down the topology
-
Name and Structure:
name: vxlan-evpn-irb– This is the name of the lab.- The topology is split into nodes (devices) and links (connections between devices).
-
Nodes:
- Spine Layer:
spine1: A containerized Arista cEOS switch using image version4.32.0.1F.- Management IP:
172.20.20.101
- Leaf Layer:
leaf1andleaf2: Arista cEOS switches using the same image version.- Management IPs:
172.20.20.11and172.20.20.12
- Host Layer:
host1andhost2: Linux containers running Alpine Linux.- They include custom network interface configurations mounted from the host.
- Management IPs:
172.20.20.21and172.20.20.22
- Spine Layer:
-
Links:
- Spine to Leaf:
spine1:eth1↔leaf1:eth1spine1:eth2↔leaf2:eth1
- Leaf to Host:
leaf1:eth2↔host1:eth1leaf2:eth2↔host2:eth1
- Spine to Leaf:
This topology is a typical spine-leaf architecture, common in datacenters to enable Layer 2 and Layer 3 connectivity with VXLAN EVPN configurations.
Deploying the lab
We'll deploy the lab with DevPod in two ways:
1. Using the repository
-
Validate the AWS provider configuration: make sure your AWS provider is properly configured. More details here.
-
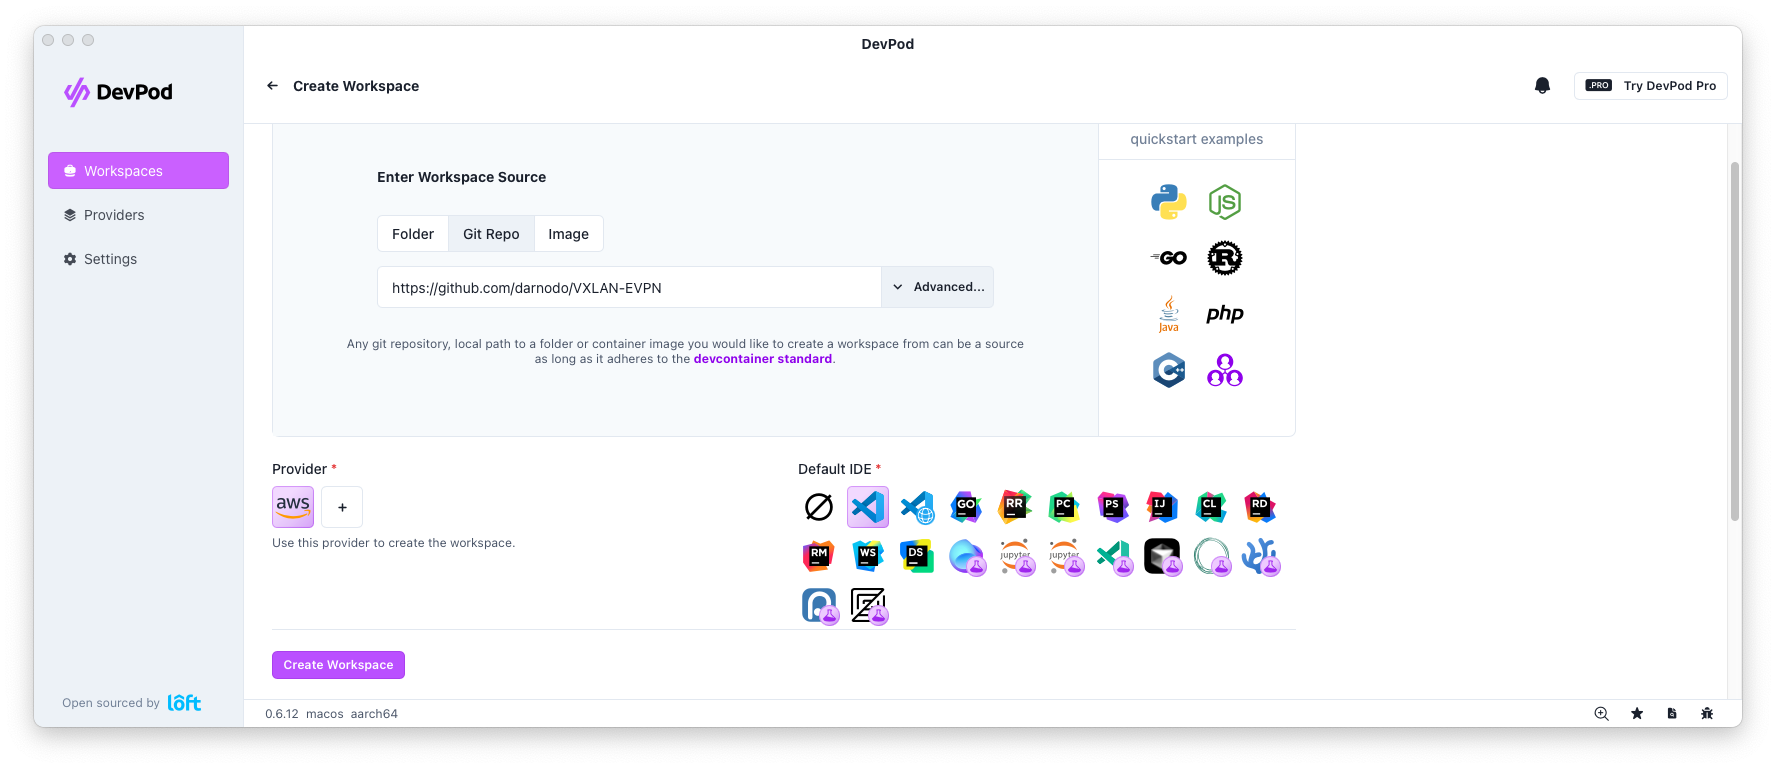
Create a workspace:
- Go to the Workspace tab and click Create Workspace.
- Specify the Workspace source: use the GitHub repository.
- Select AWS as the provider.
- Choose your default IDE.
- Finally, click Create Workspace.

2. Using a local folder
If you prefer to use your local repository, the only difference is in the Workspace source: simply point it to your local repository.

Starting the lab
[!WARNING] cEOS images The lab uses cEOS image v4.32.0.1F. To download this image, head over to the Arista download page.
-
Import the cEOS image: save the cEOS image into your
network_imagesfolder by dragging and dropping it into VSCode. Import the image using the following command:docker import network_images/cEOS64-lab-4.32.0.1F.tar.xz ceos:4.32.0.1F -
Deploy the lab using Containerlab:
sudo containerlab deploy -t lab_vxlan.ymlFollow the CLI instructions to configure your devices. For detailed configuration steps, check out this guide.
-
Visualize the architecture: check the deployed topology using Containerlab's graphical view.
containerlab graph -t lab_vxlan.ymlPorts (for example, port 50080 mentioned in
devcontainer.json) are forwarded. Access the graphical view via localhost.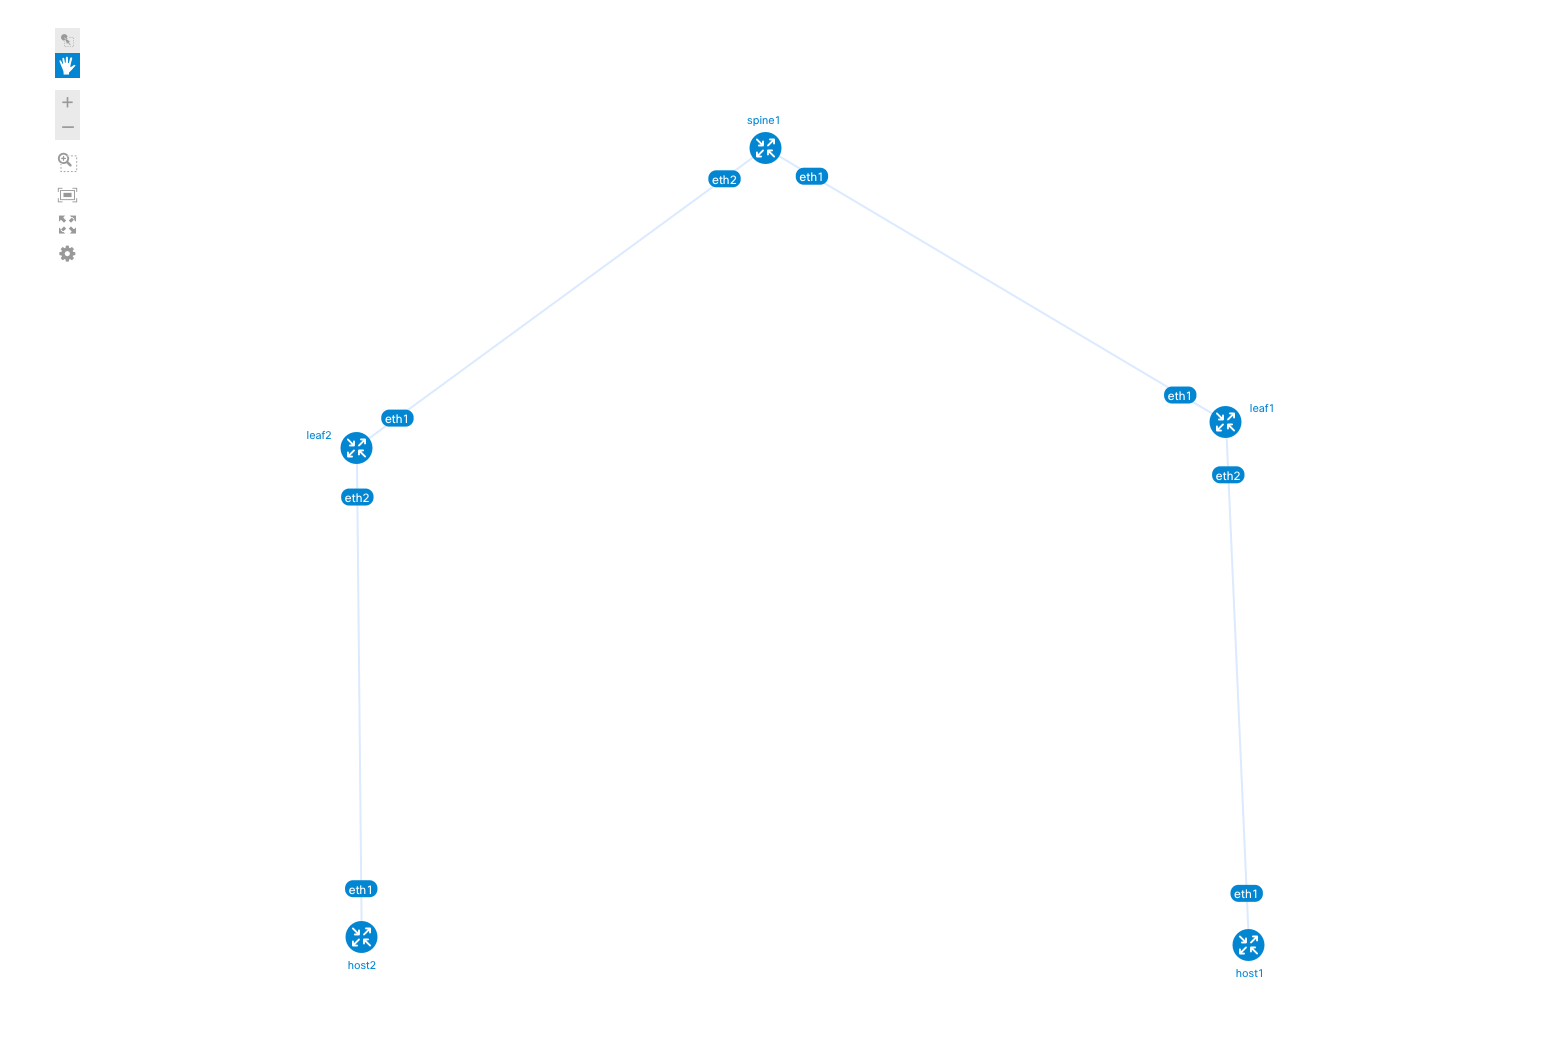

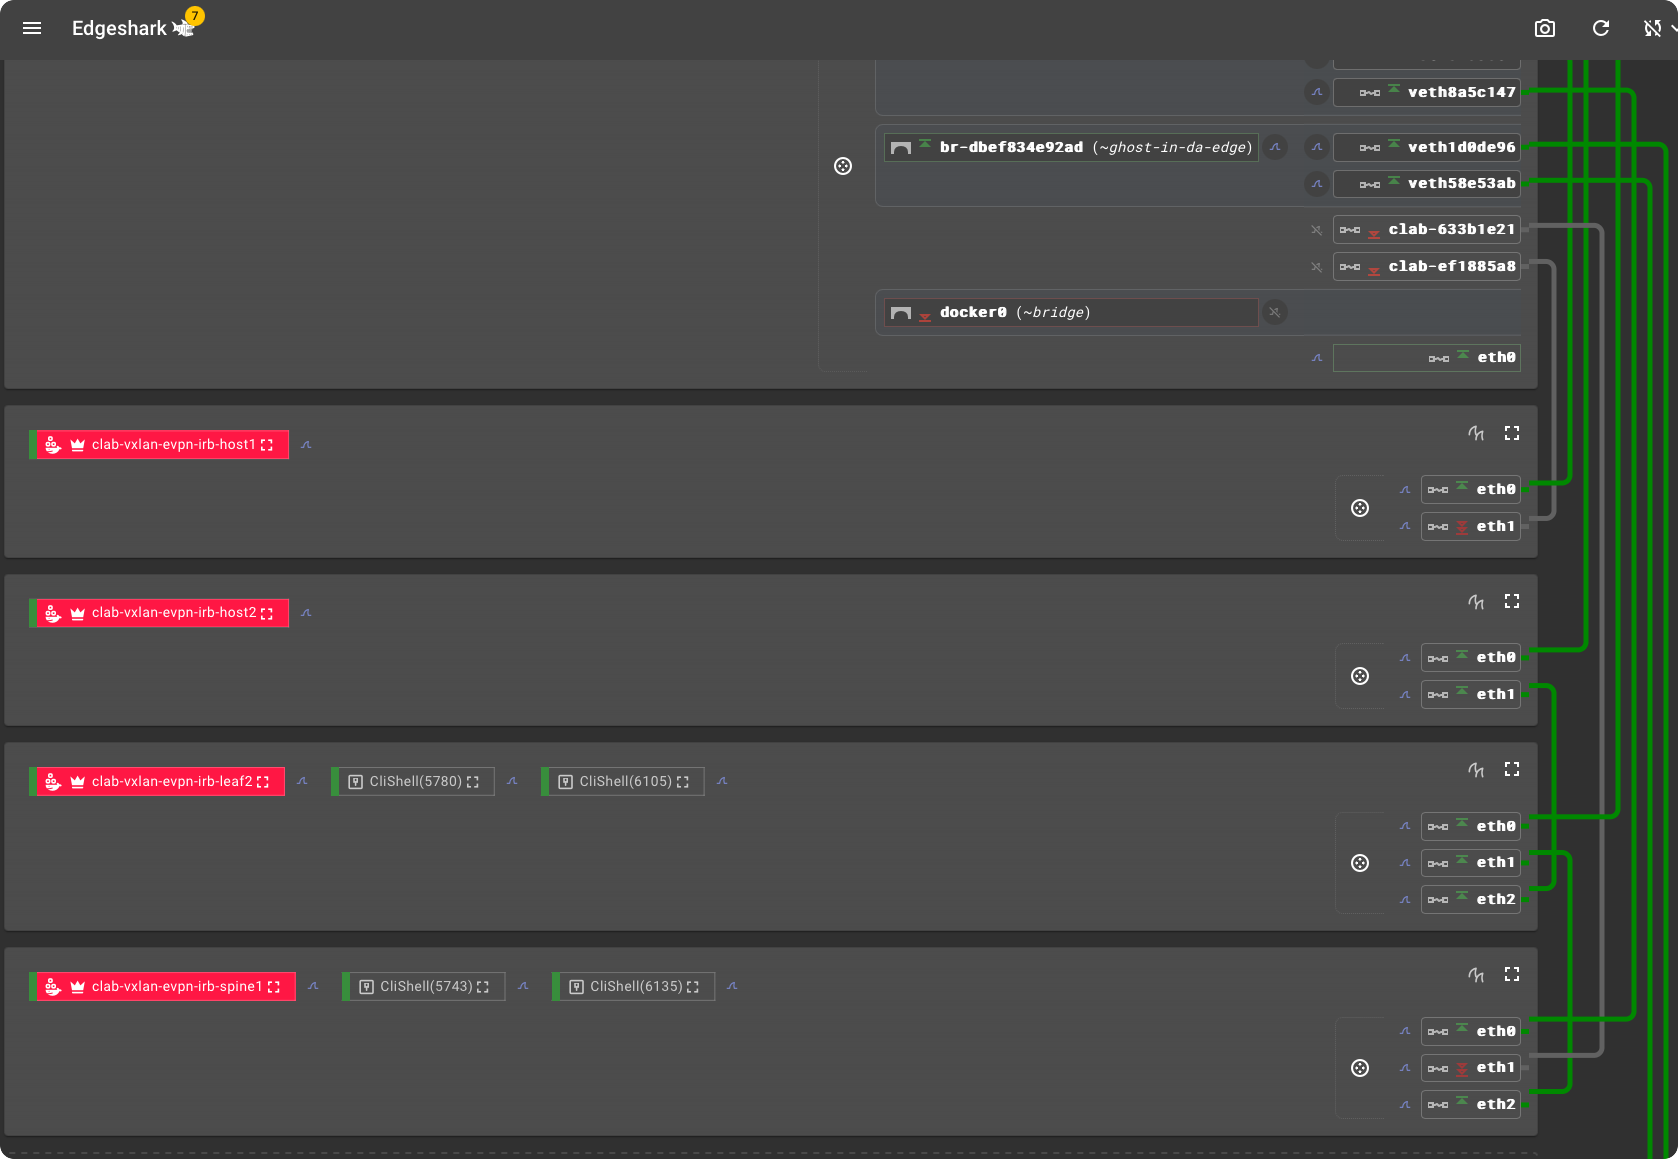
Using EdgeShark
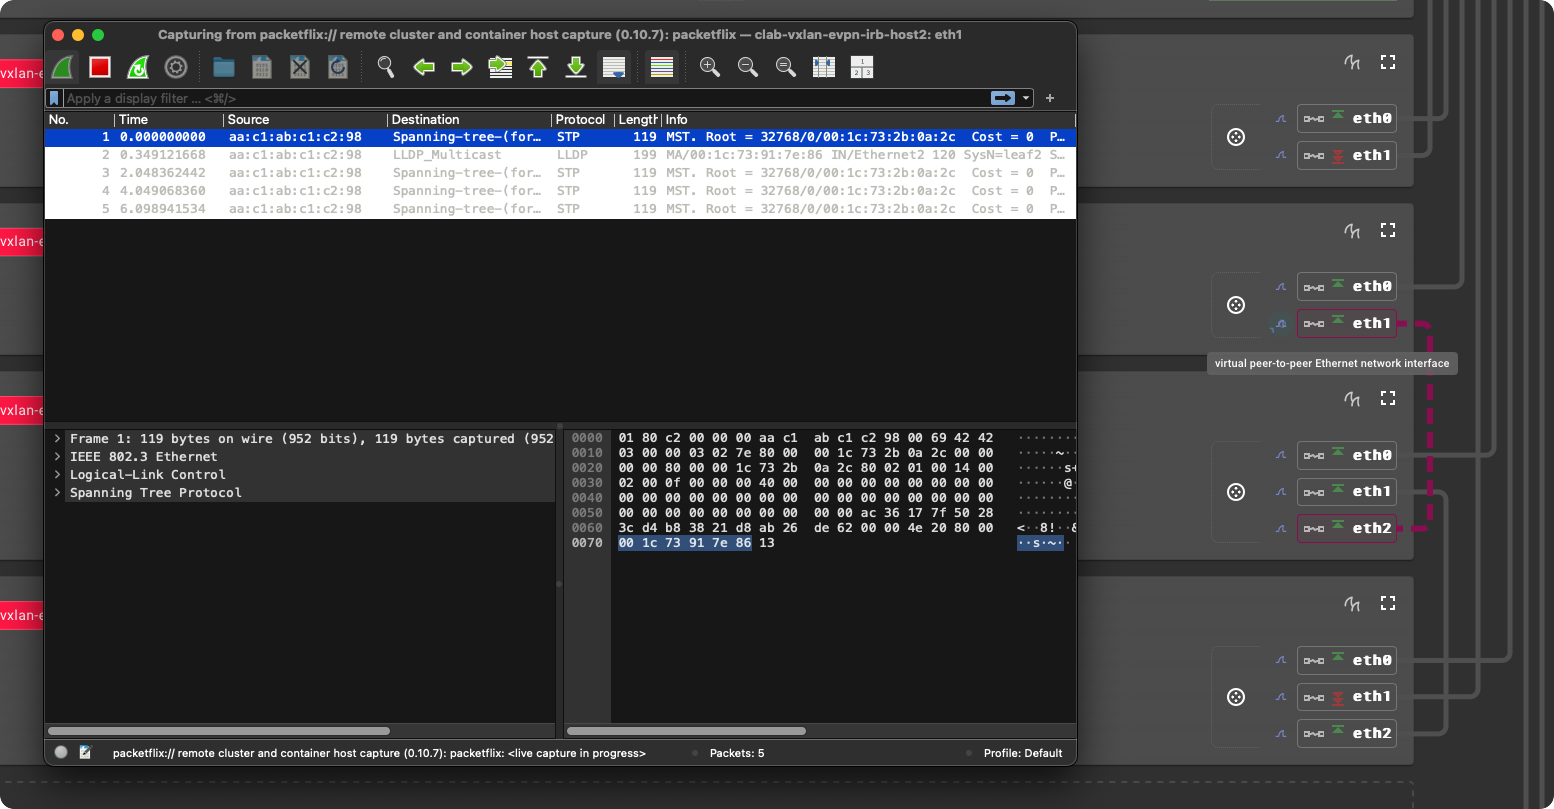
EdgeShark is a web tool that lets you capture packets from your lab environment. It forwards lab captures to Wireshark running locally.
For more information, check out the EdgeShark getting started guide.
Configuring EdgeShark in the DevContainer
In the DevContainer configuration, the following postCreateCommand was added:
sudo mkdir -p /opt/edgeshark && sudo curl -sL https://github.com/siemens/edgeshark/raw/main/deployments/wget/docker-compose.yaml -o /opt/edgeshark/docker-compose.yaml
This command downloads a Docker Compose file to make it easier to use EdgeShark.
Launching EdgeShark
To start EdgeShark, run:
cd /opt/edgeshark
DOCKER_DEFAULT_PLATFORM= docker compose up -d
Access EdgeShark via localhost:5001.
-
EdgeShark view:
-
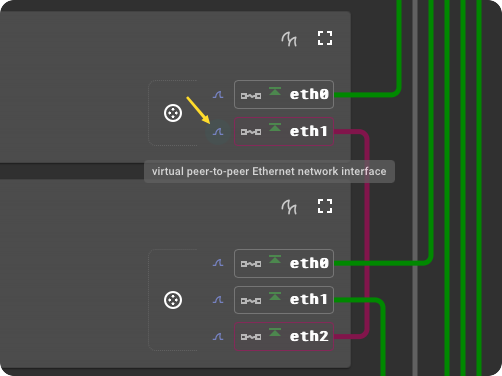
Integration with Wireshark: clicking the Wireshark icon in EdgeShark launches Wireshark locally.


Conclusion
That covers the full setup: prerequisites, the VXLAN topology, deploying the lab with DevPod on AWS, and capturing traffic with EdgeShark and Wireshark. From here you have a working spine-leaf lab you can tear down and redeploy whenever you need it.